Bring the exterior together
House rendering in Wilmslow | Plan a coherent exterior
A whole-house rendering project should make the exterior feel considered from every side, including the parts seen from the garden or through a window. The colour, grain and treatment of openings all contribute, but so do decisions about the surfaces beneath them. For a Wilmslow house, the useful starting point is a clear account of the changes you want: replacing failed render, bringing an extension into the composition, changing colour or redesigning the exterior alongside new glazing.

On this page
Describe the result in terms of the building
Collect views of the front, sides and rear before narrowing the finish. Mark the elements that will remain: brickwork, stone, window frames, roof coverings and doors. These are the colours and textures the new surface must sit beside. A photograph of a different house can communicate a general preference, but its materials and proportions may bear little resemblance to your own. Use it as a reference for discussion rather than a complete specification.
Consider how the building is seen in ordinary use. A rear elevation may be more prominent from the main living rooms than the frontage is from the road. A side wall may receive strong oblique light, making its texture particularly noticeable. These observations help choose sample positions and define the appearance that matters. They do not establish which technical system is suitable; that depends on the construction and condition.
- Scaffold and protection Windows, doors, paths and planting are covered; downpipes, lights and satellite brackets come off.
- Old finish tested or removed Failed render is removed; the survey decides whether any sound areas can remain within the specified system.
- Masonry repairs and beads Cracked bricks and open joints are repaired; corner, stop and base beads are fixed.
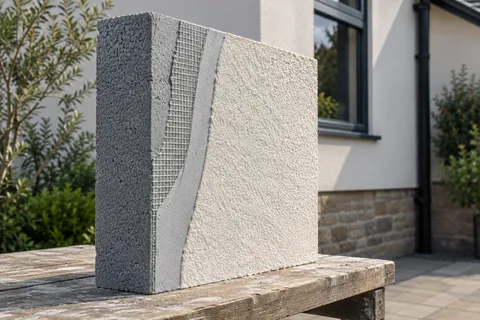
- Base coats Sand-and-cement scratch and float coats, or a manufacturer basecoat with mesh.
- Finish coat A painted, scraped or thin-coat coloured finish, applied in suitable weather.
- Fittings and junctions Fittings are refixed through the new surface; sills, roofline and abutments are sealed.
The usual order of work. The survey and the chosen products decide the actual steps.
Map the work behind the proposed colour
One house can contain new blockwork, old painted render and repaired sections around altered openings. Those backgrounds should be identified separately in the scope. A uniform final colour does not mean the preparation beneath it is uniform. The proposal should show what remains, what is removed and where additional assessment is needed before the next stage is agreed.
Where the existing finish is sound, recoating may be an option for changing its appearance. If only one elevation needs replacement, a focused wall rendering contract may be more proportionate. These are different scopes from installing a new system around the whole house. Comparing them early helps prevent a decorative preference from turning into unnecessary removal, or a serious defect being addressed with decoration alone.
Set the material and visual choices alongside each other
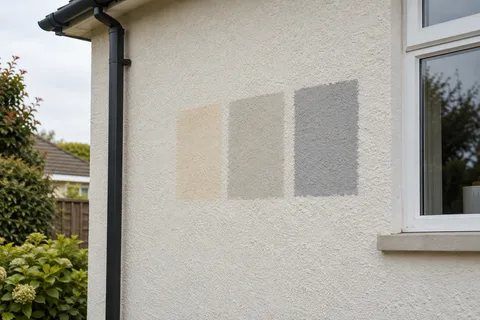
Silicone systems and monocouche finishes produce different textures and have different build-up requirements. Compare suitable complete proposals for the actual walls, then review their appearance. A product's popularity elsewhere cannot establish its suitability here, and a small swatch cannot show how a full elevation will read beside dark frames or existing brick.
Where traditional construction is involved, lime rendering needs a compatibility assessment rather than selection from a decorative palette alone. Later additions may justify a separate approach. It is possible to create a coherent exterior while acknowledging those differences. The important point is to make each transition deliberate and avoid using an identical colour as an excuse to ignore unlike substrates.
| Decision | What establishes it |
|---|---|
| Technical specification | The construction, condition and selected system |
| Finished appearance | Physical samples, texture and retained materials |
| Project sequence | Glazing, roof work, fittings and access arrangements |
Coordinate the glazing before finishing the openings
Replacement windows and large extension openings can change the details around them. The position of a frame, its sill and the intended reveal finish should be settled before the surrounding render is completed. Otherwise, the new work can become part of the next trade's removal. Bring the relevant drawings and responsibilities together, especially when the glazing and rendering have been commissioned separately.
The same exercise should include rainwater fittings, lights, awnings and other attachments. Establish which items will be removed, where they will return and how their fixings suit the wall. If external insulation is being considered, those positions may change significantly because the wall face moves outward. It is better to resolve that choice before agreeing a render-only detail that will later need redesign.


Agree samples and the occupied-home programme
A useful sample represents both the intended texture and the relevant surroundings. View it beside retained materials when dry and under different light conditions. Where the house has more than one texture, review the colour on each rather than assuming it will appear identical. Keep the approved product references and sample photographs so the decision remains clear when different elevations are completed at different times.
The work programme should explain how the house remains usable. Entrances, deliveries, bins and outdoor equipment all need consideration. Access arrangements must suit the actual work and be planned by competent people. If removal creates a different protection requirement from application, the method should reflect that. A family should not discover on the first morning that the only practical entrance sits inside an unplanned work zone.
Weather and product requirements may affect the sequence. Agree how prepared areas, materials and fresh finishes will be protected and how changes to the programme will be communicated. This is more useful than a fixed completion promise that takes no account of the selected system. The contractor's plan should allow the relevant stages to reach the condition required before work proceeds.
Finish with a record of the exterior you now have
Walk the completed scope against the agreed elevation schedule and sample reference. Include reveals, reinstated fittings and areas that were intentionally left untreated. Separate unfinished tasks from defects needing correction so the remaining work is clear. A broad statement that the house is done should not conceal a list of small responsibilities that nobody owns.
Retain the materials, colours, drawings and maintenance information together. A later light fitting, extension or local repair can then be planned with knowledge of the installed finish. That record is useful even when every elevation looks similar, because the underlying preparations may differ. The finished project should be visually coherent and straightforward to maintain, with its important decisions still understandable after the access equipment has gone.
Common questions
Can an extension and the original house share a colour?
They can be coordinated, but they may need different preparation or render build-ups. Review the proposed products and samples together. Matching a colour name is not enough to guarantee that unlike textures or systems will appear identical on adjoining walls.
Is whole-house rendering always preferable to doing one side?
No. The condition and intended change should determine the extent. A coherent single-elevation project can be sensible where the other walls are serviceable. Planning the wider exterior still helps establish a suitable stopping point and avoids completing details that later work would immediately disturb.
See housing and planning information for Wilmslow and nearby places, including the source and geography behind each figure.